www.LillianKennedy.com
Lillian@Rockfire.com
The one-eyed approach to doing research and taking short cuts when deadlines loom.
You don’t want to leave buried treasure when there can be a map to it. Whether you are just beginning to do art or winding down a long career, it’s always good to keep a stash of time-saving techniques so that when a wonderful opportunity comes at an inopportune time, you can still have a shot at it.
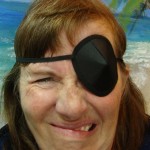
No, the opportunity I’m working on is not to replace Johnny Depp in Pirates of the Caribbean – even though he did film part of it in the Tobago Cays, the location I need to paint. Between cataract surgeries my eyes wouldn’t work together, and I hadn’t planned on painting during this period.
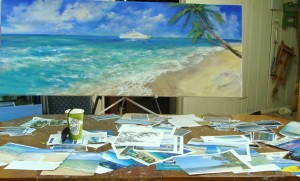
But… the deadline was closer that I had thought and the client did not send the usual references. Needing to actually have the paintings there when the boat goes out (so that my ship can come in), I created the composition by patching together images from a variety of sources. How does that work?
Step 1. Gather your reference possibilities from every possible source.
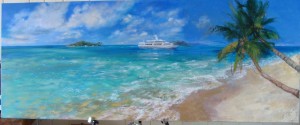
- Detail
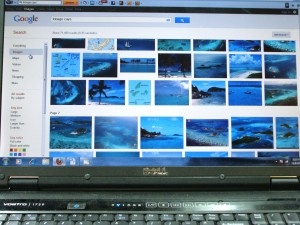
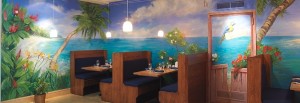
- I had quite a reference collection from a Caribbean mural painted five years ago. For specifics on the Tabago Cays, I went on line to Google images. Last week I showed you how to use Google Maps to get specific views. Google images is a collection of tagged photos. When you go to Google you will see a choice including Images (note photo below). On your computer, when you see Images (it may not be in left sidebar as in this photo), click on it and you will have enough material to give you a feel for most places. If you don’t see what you want, try typing in different words.
You never know where you’ll find material, so keep your eyes open. I hadn’t found the right palm trees, but while waiting for eye-drops at Safeway, I saw a “Paradise” calendar featuring them. Voilà! Exactly what I needed in the last place I would have looked.
They wanted the Tabago Cays, an isolated feel, deserted islands, and their yacht. The canvas size was to be 26″ x 64″.
Step 2. Simplify: design with vine charcoal to get your basic shapes.
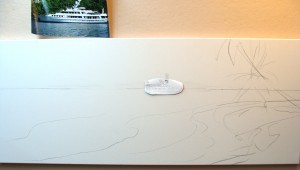
In this case, the first thing to decide was the concept and I went with a view from a secluded beach. Then the horizon line, basic shape of land, placement and direction of the boat. Almost done.
I had a photo of the boat. It was facing in the wrong direction.
♦TIP: do you remember how to trace using a glass window? I photographed their image, printed it out black and white on a smaller scale, and traced it in reverse by holding it up against the glass so that I could see through the print and get strong lines of the boat facing in the direction that I wanted.
Step 3. Don’t do more work than you need to do to get the result you want.
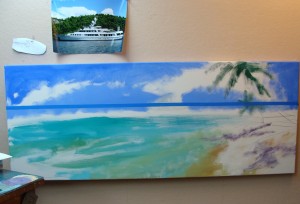
For example: Straight lines – USE A RULER. Note the blue tape used to define the horizon. Why would anyone do that free hand? It is essential when doing the ocean to get a level horizon line.
After doing an under-painting for the sky (it dries fast being acrylic), place the tape so that the bottom edge is on the horizon line. Then paint the base coat for the water (just don’t get the color of the water over the top edge of the tape).
Step 4. Combine ideas from all your reference images.
The water is being developed from many sources. By going back to Google images, I determined that the beach would need very light sand and the water shallow.
Step 5: Take a break when you need to – it won’t help to work when you aren’t in top form.
As you can see, I’m trying many things for the palm trees and “spinning my wheels”. It IS time to rotate and work on the other commissions. Time will be scheduled to come back to this one before the deadline.
♦ Tip: you can draw on top of dry paint with the vine charcoal to try out new ideas. If you click on the image to enlarge it, you will see how this redesigning is in progress.
Assignment: Try some of these ideas and start thinking about what is in your bag of tricks. Please share your ideas / responses in the comments section.
You might also like: Commissioned Paintings: Part I – Client Requests

