Follow these five simple tips and learn to draw palm trees – symbols of relaxation, warmth, and beach vacations.
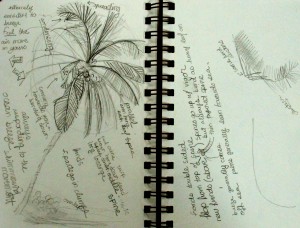
This lesson was planned while in Puerto Rico a few weeks ago. The Kit in a Baggie worked great even in the pool.
Take a deep breath and imagine that you are inhaling fresh sea air while you close your eyes for a moment. Ready? Get some paper and a pencil.
Five Steps to Drawing Palm Trees
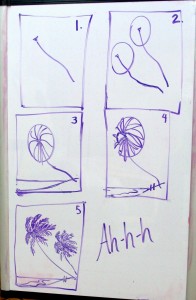
1. Make an angled organically wiggly line. This is the trunk. Any little kink or twist adds life.
Put a small inverted triangle or mark on the top of your line. This is the growing center for the palm fronds. You don’t need to do this, but it helps to stay organized. Remember, palms don’t have limbs growing out at various places along the trunk as most trees do. The growth happens from this center at the top.
2. Make an imperfect oval over the top of the trunk. At this stage your palms will look like drunken lollipops. Make as many as you like (it’s your imagination after all).
3. Draw a sloping line under your palm tree to represent the beach. Follow the diagram. Make sure your palm leans towards the sea.
Next make a low horizontal line to represent the horizon line / the level line where the ocean meets the sky.
Starting at your little triangle, make curved lines all around and let them extend to the oval. These lines represent one edge of the palm fronds.
4. Draw the other edge of the palm fronds. Each frond is tapered and makes a long sword shape. See if you can make one frond come out towards you.
Put a squiggly line in the water and two little vertical lines on the beach. Now you can see yourself walking with someone else (just erase that other line if you want some alone time). Sigh.
5. Make a line down the center of the fronds and draw lines from the center to the edge slanting toward the tips to represent the individual tapered leaves.
Add some little ovals on your little stick people for the heads. Erase the oval that you used as a guide.
Repeat as needed for a mini break.


