When things just aren’t looking “right” in your drawing, you might want to use some techniques that will help you assess what you are seeing. Think of these techniques as sight-check akin to spell-check in writing.
This may take you out of the flow for a few moments, but the logical way of seeing is absorbing in it’s own way. It feels good to draw things in their right relationship to to everything else. (think Sudoku and crossword puzzles and how good it feels to “get” them). You can do these techniques on location with the pencil or brush that you are already holding.
This week we will explore how to assess the relative size of things. The size of things when translated to two dimensions, is entirely dependent on your view point — where you, the viewer of the scene, are at a particular moment. Move to the left or right even a little bit, or stand from sitting and the relationships change. For example, in the illustration below, if you are sitting and measure the relative difference between the height of the lake and the mountain and then stand up and measure again, the lake will “grow” higher because you will be looking slightly more down on the surface of the water. This seems true of life in general, right? What you see depends on where you stand.
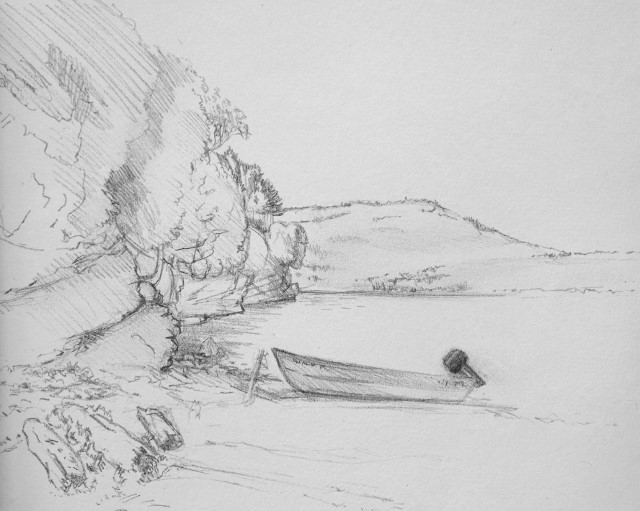
Join me now, virtually, at Whiskey Bay in Charlotte, Vermont

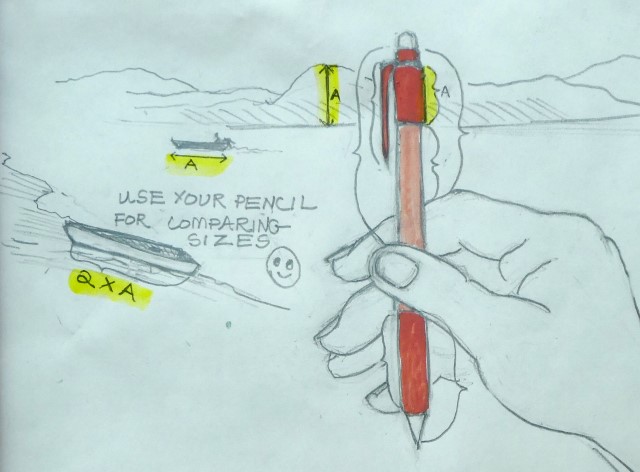
Comparing Sizes: In the illustration above, imagine you’re holding your pencil in a vertical position in front of a real landscape.
Note the brackets that I’ve drawn. They represent some of the lengths that could be used as a constant for measuring. You don’t need to know length in inches, you just need a consistent length for comparing. The distances between any the various parts of the pencil work. If none of those easily match, you can take any part of your hand that crosses the pencil shaft and position that junction at the bottom of the shape.
Directions
Rule #1: Hold your arm straight. No bent elbows. Why? Because you need to have your pencil / measuring stick at a constant distance from your eye or it’s meaningless. A stiff arm gives you a constant. You can use a brush, a twig, etc. instead of a pencil.
Rule #2: Close one eye.
Rule #3: With arm fully extended and one eye closed, hold your pencil still either vertically, horizontally, or parallel to an edge if the subject to be measured is at an angle.
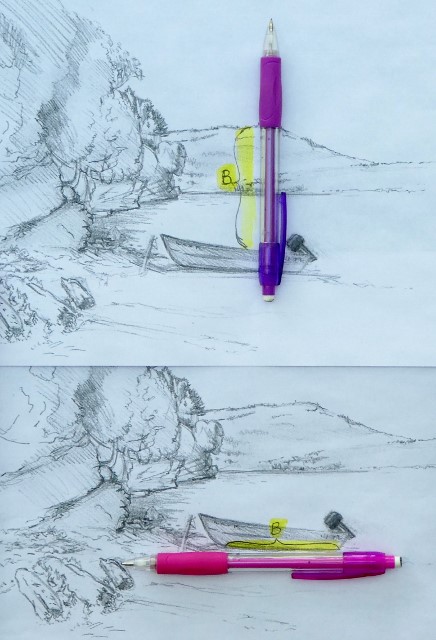
Rule #4: Find a clear marker on your pencil and place this next to the top of the shape you are measuring. In the illustration above I’ve used the bracket marked A which is highlighted in yellow because it matches the distance from the water to the top of the mountain across the lake.
Rule #6: Move the pencil to another shape to see if it it is longer or shorter. In the above, the height of the mountain = the length of the boat in the water = half the length of the boat on the shore.
Rule#7: You don’t need to reproduce what you see, but it is good to know what you really are seeing. Then change as desired.

Imagine you are sitting beside me looking out at the landscape (above) to soak in the composition. Using just your eyes, note the distance between the top of the boat and the top of the mountain across the lake. Now note the length of the bottom of the boat. To most people it will feel like the distance from the top of the boat to the top of the mountain is longer (in 2 dimensions). We know that if we got in the boat, it would take awhile to cross the lake and a long time to hike to the top of the mountain, so it seems like a lot of space. The boat, only a few yards in front of us , seems smaller in comparison. Now measure those two things in the photo, and you’ll see that the bottom of the boat is the longer line.

I drew the spaces more the way I felt they looked because I wanted a feel for a bigger mountain. Plus, I didn’t want to have a big boat in the foreground. It seems as though the those two measurements are REALLY different. But, in fact, they are the same.

What do you think? Assignment: try this technique and let me know in the comments if you have any questions about it.
